Display and Edit CLOB Content in Oracle APEX


In this post I will be explaining how to display and edit a CLOB content in Oracle APEX. 

Please follow the below steps:

1) Create a table T_EMPLOYEE

CREATE TABLE  T_EMPLOYEE
(
  EMP_ID       NUMBER,
  EMP_NAME     VARCHAR2(100),
  DESCRIPTION  CLOB 
);

2) Insert the required data into the T_EMPLOYEE table.                          

3) Create a page in the application.  (In this example Page - 5)

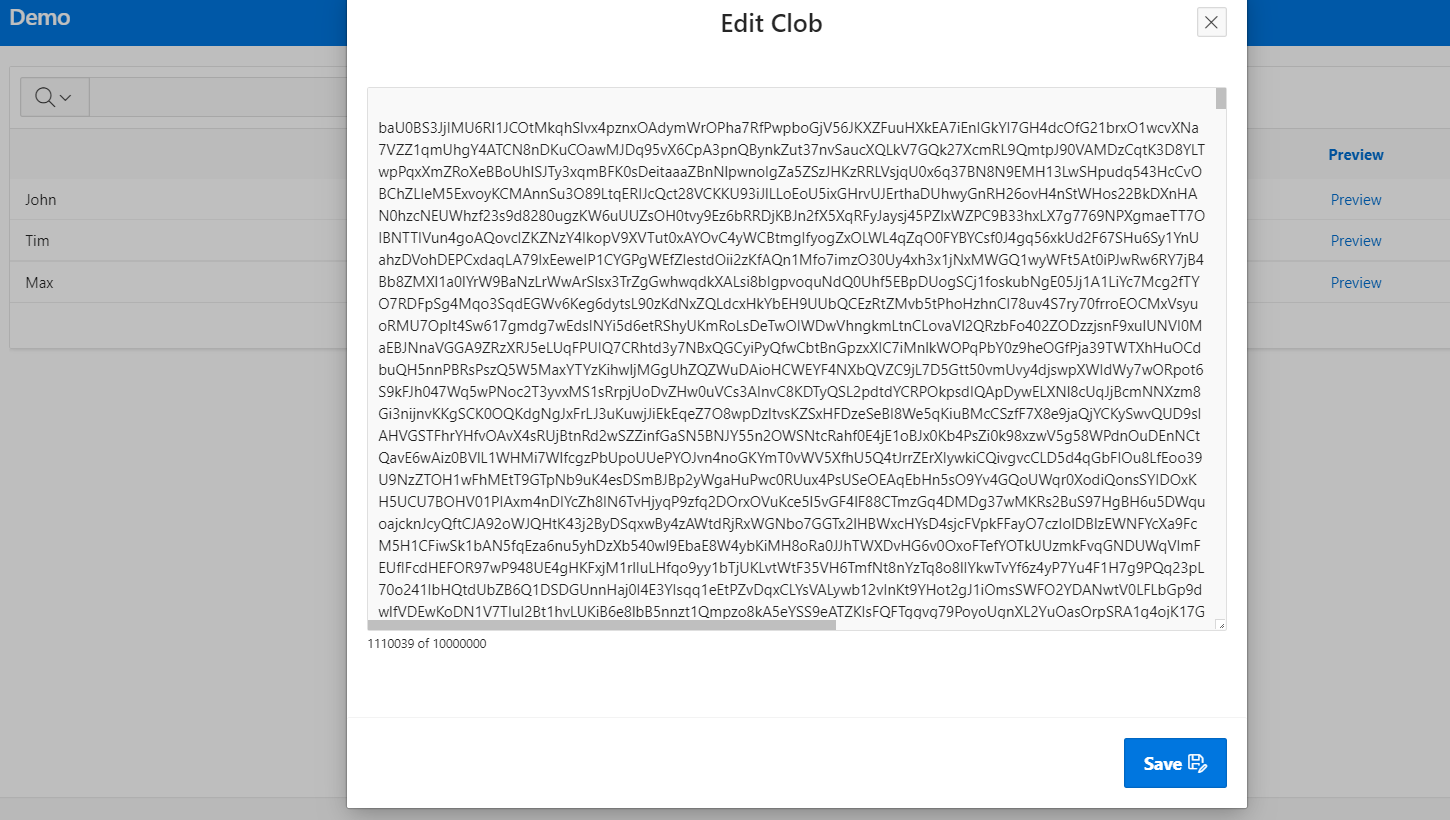
4) Create another page with the Page Mode as Modal Dialog (In this example Page - 6)


5) Create a region and two items in Page - 6. The Items are:

    P6_EMP_ID -> Type -> Hidden (Value Protected: No)

    P6_EMP_DESCRIPTION ->  Type -> Text Area  (or) Rich Text Editor

6) Now navigate back to Page - 5 and create a Region (Type -> Interactive Report)

7) Paste the below code in the Source -> SQL Query of the Interactive Report

SELECT  EMP_ID, 
        EMP_NAME,
        'Preview' as "PREVIEW"
FROM T_EMPLOYEE;

8) Go to the PREVIW column in the Interactive Report and change the Type to Link.

9) In the PREVIW column attributes:

  •  Go to Link - > Click on Target (Highlighted in red) 
  •  Choose the Target Page as 6. 
  •  Choose the Name as P6_EMP_ID and Value as EMP_ID.


10) Now navigate to Page - 6 and create an AJAX Callback process. Name it as FETCH_CLOB_DATA. Paste the below PL/SQL code:

DECLARE
LO_CLOB        CLOB;
LO_CHUNK_SIZE  NUMBER = 4000;
BEGIN
   SELECT DESCRIPTION 
      INTO LO_CLOB 
      FROM T_EMPLOYEE
   WHERE EMP_ID = apex_application.g_x01;

   FOR i IN 0 .. FLOOR(LENGTH(LO_CLOB)/LO_CHUNK_SIZE )
   LOOP
       SYS.HTP.PRN(SUBSTR(LO_CLOB, i * LO_CHUNK_SIZE + 1, LO_CHUNK_SIZE ));
   END LOOP;
END;


11) Paste the below JavaScript code in the Execute When Page Loads section of Page - 6.

var clobId = apex.item('P6_EMP_ID').getValue();

apex.server.process("FETCH_CLOB_DATA", {x01: clobId},
 {
	dataType : 'text',
	success : function (pData) {
		 apex.item('P6_EMP_DESCRIPTION').setValue(pData);
 },
	error: function(xhr, status, error){
				   var errorMessage = xhr.status + ': ' + xhr.statusText
				   console.log("Error: " + errorMessage);
 },
	loadingIndicatorPosition: "page"
});

Steps 10 and 11 will fetch the CLOB data from the table and show it in the Front End.

12) Create a button in Page - 6 (In this example P6_SAVE)

13) Create an On Click Dynamic Action on the Button P6_SAVE.

14) Create a True Action -> Execute JavaScript Code and paste the below code

var clobData  = apex.item("P6_EMP_DESCRIPTION").getValue();
var clobId    = apex.item("P6_EMP_ID").getValue();
var chunkData = apex.server.chunk(clobData);

if ( !$.isArray( chunkData ) ) {chunkData = [chunkData];}

apex.server.process("SAVE_DATA", {f01: chunkData, x01:clobId},
 {
	dataType : 'text',
	success : function (pData) {
		 apex.message.showPageSuccess('Saved Successfully');
 },
	error: function(xhr, status, error){
				   var errorMessage = xhr.status + ': ' + xhr.statusText
				   console.log("Error: " + errorMessage);
 },
	loadingIndicatorPosition: "page"
});

15) Create an AJAX Callback process. Name it as SAVE_DATA. Paste the below PL/SQL code. 

DECLARE
LO_CLOB     CLOB;
LO_TOKEN  VARCHAR2(32000);
BEGIN
   DBMS_LOB.CREATETEMPORARY(LO_CLOB, FALSE, DBMS_LOB.SESSION);

   FOR i IN 1..APEX_APPLICATION.G_F01.COUNT
   LOOP
		LO_TOKEN := APEX_APPLICATION.G_F01(i);

		IF LENGTH(LO_TOKEN) > 0
		THEN
			 DBMS_LOB.WRITEAPPEND(LO_CLOB, LENGTH(LO_TOKEN), LO_TOKEN);
		END IF;
   END LOOP;

   UPDATE T_EMPLOYEE
	  SET DESCRIPTION = LO_CLOB
   WHERE EMP_ID = apex_application.g_x01; 
END;

Steps 14 and 15 will save the edited CLOB data into the table.

Reference: apex.server.chunk, apex.server.process

Click here for DEMO

Happy CODING!!!

Thank you

Comments

  1. NUMBER = 4000, should be NUMBER := 4000
    Thank you very much for the help, this seems to work fine.

    ReplyDelete

Post a Comment

Popular posts from this blog

Allow Only Number/Decimal values In a Number/Text Field Using JavaScript in Oracle APEX

Copy the value of an Item to Clipboard in Oracle APEX